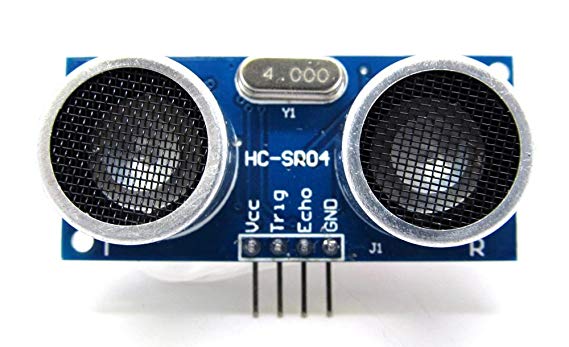
Pendant 2 jours nous avons appris le codage avec le logiciel Arduino. Grâce à la Arduino uno nous avons tester un allumage de LED et ensuite grâce à logiciel nous avons essayer de programmer les LED grâce au codage et essayer de modifier l’allumage des lumières grâce à un capteur à ultra son.

Comme exemple si dessous voici un exemple de codage pour contrôler le temps des lumières de 3 LED.
int yami=13;
int zork=12;
int necrofear=11;
// the setup function runs once when you press reset or power the board
void setup() {
// initialize digital pin 11 as an output.
pinMode(necrofear, OUTPUT);
// initialize digital pin 13 as an output.
pinMode(yami, OUTPUT);
// initialize digital pin 12 as an output.
pinMode(zork, OUTPUT);
}
// the loop function runs over and over again forever
void loop() {
digitalWrite(necrofear, HIGH); // turn the LED on (HIGH is the voltage level)
delay(1000); // wait for a second
digitalWrite(necrofear, LOW); // turn the LED off by making the voltage LOW
delay(1000); // wait for a second
digitalWrite(yami, HIGH); // turn the LED on (HIGH is the voltage level)
delay(1000); // wait for a second
digitalWrite(yami, LOW); // turn the LED off by making the voltage LOW
delay(1000); // wait for a second
digitalWrite(zork, HIGH); // turn the LED on (HIGH is the voltage level)
delay(1000); // wait for a second
digitalWrite(zork, LOW); // turn the LED off by making the voltage LOW
delay(1000); // wait for a second
}
Laisser un commentaire